


Text can be a powerful tool in film and video editing. Every element you include in your timeline should serve a purpose — driving the story forward, enhancing clarity, or reinforcing your brand. This goes beyond visuals and dialogue — your on-screen text is key in guiding viewers, introducing characters, and providing context. Whether you’re creating titles, typography videos, or lower thirds, Adobe Premiere Pro makes it easy to add, edit, and customize text using built-in tools like the Essential Graphics panel.
In this guide, you’ll learn how to add text in Premiere Pro, work with templates, animate titles, and more.

Summary
Essential graphics panel
The Essential Graphics panel is the primary place to design and customize text and titles in Premiere Pro. You can find it by going to Window > Essential Graphics — within the panel, you can create new text layers, adjust the layout and appearance, and save templates for future use.
The Essential Graphics panel replaces the older Legacy Title Designer, which was once the main tool for creating text in Premiere Pro. While the Legacy Title tool offered static design options in a separate window, the Essential Graphics panel allows for more dynamic and flexible editing directly within the Timeline. It supports animations, templates, and responsive design — making it better suited for motion graphics workflows.
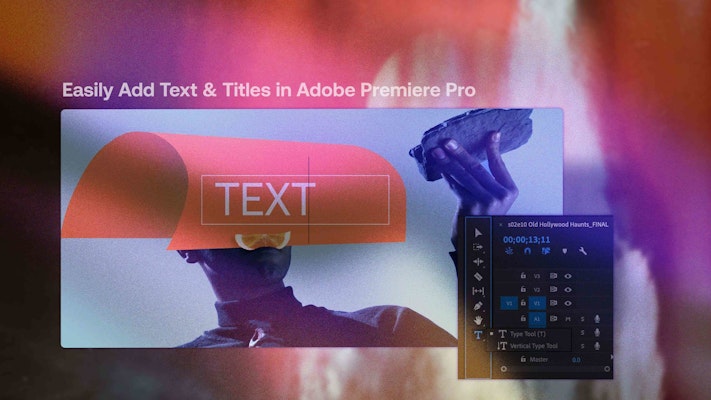
Step 1 — Adding basic text in Premiere Pro
To get started with adding basic text in Premiere Pro, follow these simple steps to create and customize your titles directly within the Timeline.
- Open the Graphics workspace by going to Window > Workspaces > Graphics.
- Select the Type Tool by clicking the “T” icon or pressing T on your keyboard.
- Click anywhere in the Program Monitor and begin typing.
- Use the Edit tab in the Essential Graphics panel to style your text, including font, size, alignment, and color.
- Adjust the position of your text in the Program Monitor or use the alignment tools in the panel.
- Drag the text clip to where you want it on the Timeline.
Step 2 — Using transitions for text animations
Transitional animations can add a dynamic touch to your titles, making them feel more engaging. Basic animations like fade-ins, fade-outs, and wipes effects are easy to apply and can help emphasize key moments in your video.
- Once you have created your title element, navigate to the Effects panel.
- Search through the Video Transitions folder to find the simple effect you want to use.
- Drag the transition to the start or end of the title element.
- Select the transition attached to your title and go to the Effects Control Panel to make adjustments.

Step 3 — Using Keyframe animation
Keyframe animation in Premiere Pro allows you to create custom animations by adjusting properties like position, scale, and opacity over time.
- With your basic title element in your Timeline, place your Playhead where you want the animation to begin.
- In the Effects Controls Panel, click the Stopwatch icon for the property you want to animate — a diamond shape will appear in the Keyframe editor.
- Move along the Timeline to the point you want the animation to finish, and adjust the property in the Effects Controls Panel to the new setting.
- You will need at least two Keyframes to complete an animation.
Creating and using title templates
Premiere Pro makes creating and using title templates easy, saves time, and maintains consistency across your project. You can use the built-in templates from the Essential Graphics panel or import your own Motion graphics templates (.mogrt). These templates can be customized for a variety of text elements, from lower thirds to typography and infographics.
Step 1 — Add a template to your library
It’s good practice to organize your .MOGRT downloads into their own dedicated folders. This ensures that you can easily locate and manage your templates later, and it helps avoid issues when moving or deleting files, keeping your project and assets well-organized.
- Choose and download your lower third pack from Motion Array.
- Open the .zip folder in your Finder window and locate the folder containing the.MOGRT files.
- In a separate Finder window — create a new folder to house all your downloadable Premiere Pro templates.
- Copy the .MOGRT folder across to the new folder.
- Open Premiere Pro and navigate to the Essential Graphics panel.
- Bring up the Finder window with your downloaded content — select the .MOGRT files and drag them to the Essential Graphics panel.
Step 2 — Adding and customizing your templates
Lower thirds are essential for many video projects, particularly for interviews, vlogs, or documentaries. They provide a clean and professional way to display names, titles, or additional context on-screen.
- Choose your lower third template in the Essential Graphics panel and drag it to the Timeline.
- Position the lower third above your footage.
- With the lower third selected in the Timeline, go to the Properties panel.
- Work through the Properties options, adjusting the style, position, and scale of the individual elements.
Get creative with Motion Array title templates
To apply lower thirds in Premiere Pro, you can use pre-made templates from Motion Array, which offers a massive library of title animations available for download. These templates are fully customizable with fonts, colors, and animations to match your video style.
Motion Array’s collection covers a wide range of needs. For sleek, modern designs, explore their typography titles, perfect for social media or presentations. Lower thirds add professional touches to interviews or vlogs, while infographics can bring data and statistics to life.
You can also use icons to enhance your content with minimalistic visual elements.
Motion Array’s extensive library allows you to quickly find templates that elevate your video projects with minimal effort
Top tips for working with Premiere Pro titles
These tips will help you optimize your workflow and ensure your titles and text elements are clean, professional, and easily editable.
How to change the text later
If you need to update your text after adding it to the Timeline, simply select the text layer in the Essential Graphics panel, make your edits, and the changes will automatically update on your Timeline.
Aligning and centering text
Use the alignment tools in the Essential Graphics panel to quickly center your text or align it to specific areas of the screen. You can also adjust the position manually in the Program Monitor.
Layering text over video
When layering text over video, ensure it’s visible by adjusting the text color, adding a background, or using a shadow or stroke effect for better contrast against the video.
Saving the template for later
Once you’ve created a title or lower third you like, you can save it as a Motion Graphics Template. Just click the hamburger menu in the Essential Graphics panel and select “Export As Motion Graphics Template“ to reuse it in future projects.
Group text layers together
For better organization, group similar text layers together in the Timeline. This will make it easier to adjust them as a whole, and it’s a great way to keep your project organized.
Bringing your titles to life
For quick, customizable results, explore Motion Array’s vast library of motion graphics templates. Whether you want to create eye-catching titles, dynamic lower thirds, or compelling infographics, these templates help engage your audience and enhance your storytelling. With minimal effort, you can add professional-grade animations and text elements that captivate viewers and elevate your videos. Browse Motion Array’s collection and start creating content that stands out today!


