Do you have a need for speed? It’s always ideal to shoot for slow-motion effects with the camera itself. But what if you’ve already shot your footage at a lower frame rate, you’re working with stock video, or you just figured out you want slow motion in the editing phase? Adobe Premiere Pro slow-motion effects are the perfect way to add visual interest to your next project.
Below, Motion Array will look at some tricks to get the best possible manufactured slow motion in Premiere Pro, plus you will learn how to create speed ramping effects. It’s time to get creative with speed.
Summary
What is slow motion footage?
Before diving into speed effects in Adobe Premiere Pro, it’s critical to understand exactly what slow motion is. So, let’s back up a little.
Video, or any moving image, is a series of still images (frames) played back in a sequence. It typically plays at a frame rate of 24fps or 30fps. You can create slow motion when the shooting frame rate is higher than the playback frame rate (so, greater than 30fps). Shooting video at 60fps, for example, will yield slow-motion playback.
Ideally, you’ll shoot your footage at a high frame rate if you want true slow-motion film. Most modern cameras have the option to shoot between 60 and 240fps. You’ll need a specialty camera to get more extreme slow-motion effects.
What happens if your footage wasn’t shot in slow motion, however? That’s why you have Adobe Premiere Pro slow-motion effects to help.
How Premiere Pro simulates a high frame rate camera
The problem with artificial slow motion is that, to raise the original shooting frame rate, Adobe Premiere Pro must generate more frames. It can do this by repeating existing frames or analyzing your footage and automatically generating new frames.
When the software repeats existing frames, the result is choppy (which has a time and a place, too). When it generates new frames, imperfections in the interpretation can cause warping and artifacting errors. But no worries — you can get the best results when you understand the tools, and that’s what Motion Array is here to help you with.
Speed and duration
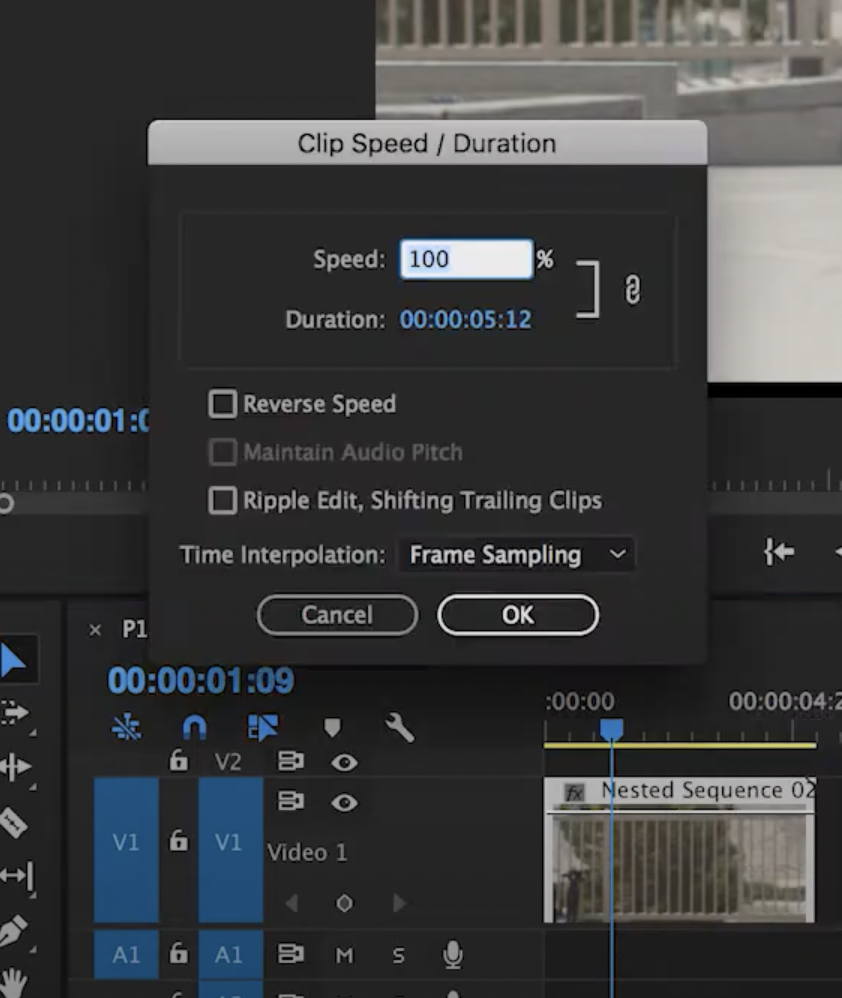
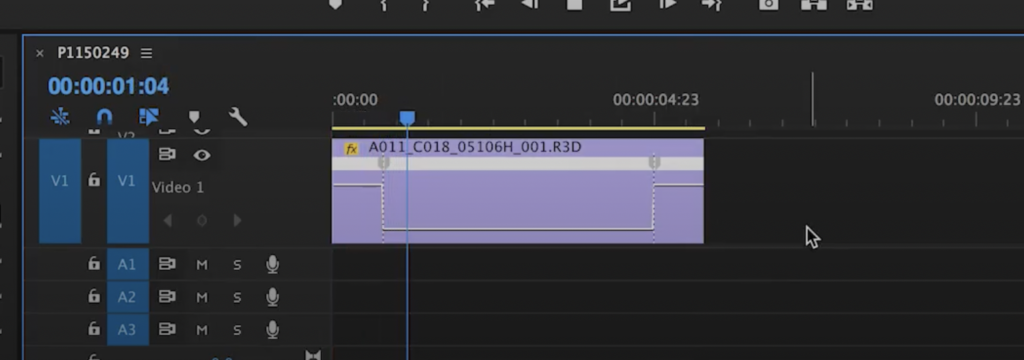
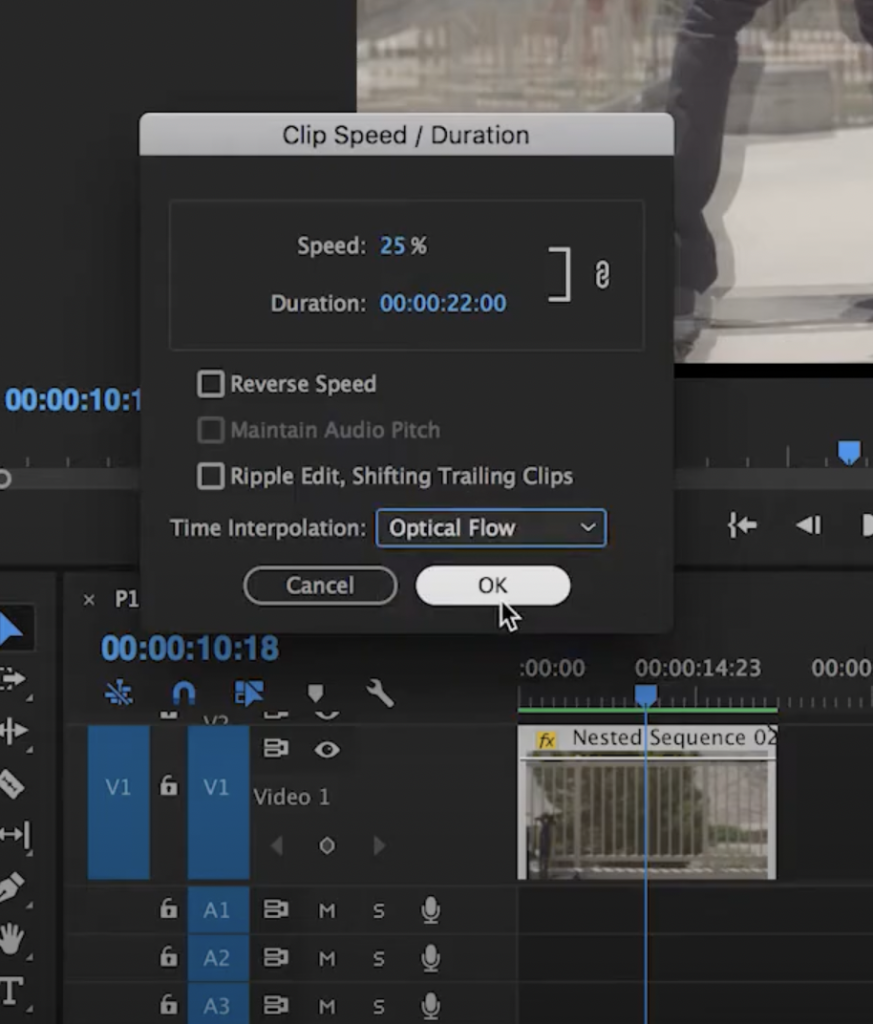
In Adobe Premiere Pro, the Speed/Duration module is the easiest way to create slow-motion videos. Right-click a clip and choose Speed/Duration. To slow down your clip, type a percentage lower than 100%. For example, 50% will play your clip back at half the original speed, doubling the clip’s duration. If you’d like, why not try this out with some stock video?
Alternatively, if you want your clip to be a specific duration, type that into the Duration section, and Premiere Pro will adjust the speed accordingly. To change speed or duration independently without affecting the other setting, click the Gang button. It should look like a broken link.
Speed and Duration adjustments in Adobe Premiere Pro are great for a quick job. Think of a clip that only needs a slight adjustment, a simple stylized look, or making something already shot in slow motion look even slower. It lacks some style, but it’ll get the job done. If you’re looking for more elegant slow motion in Premiere Pro, there are a few other things to try.
Create a speed ramp with time remapping
Speed ramping is the process of progressively changing the speed of a clip over time. Here’s an example using this stock clip of a dancer:
Before getting started, click and drag to increase the height of the video track you’ll be working with so that you can see what you’re doing in the next steps.
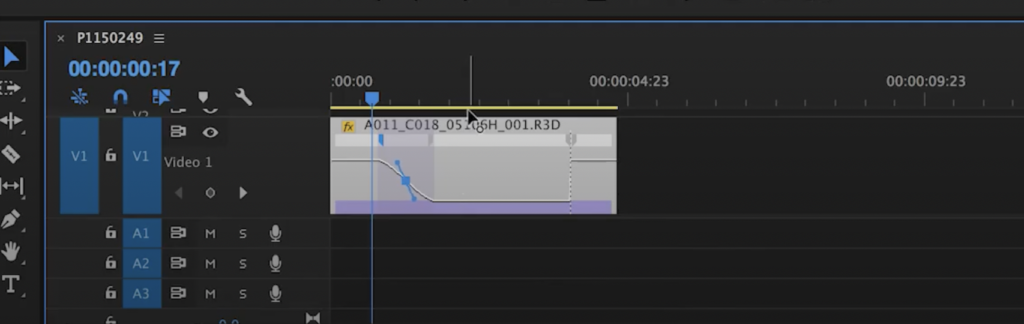
Now, right-click the clip and select Show Clip Keyframes > Time Remapping > Speed.
A horizontal band will appear. This band controls the speed of the clip. Dragging the band up and down will adjust the entire clip’s speed (and, in turn, duration).

To create a progressive speed change you’ll need to add keyframes. For an effect where the speed ramps up or down to highlight a motion and then goes back to normal speed, you’ll need to create two keyframes, separating the clip into three sections. Command + Click (Mac) or Control + Click (PC) the band to create keyframes. Click and drag the middle section up for fast motion and down for slow motion.
The speed change you just created will be abrupt. To smooth the ramp:
- Click and drag your keyframe to split it.
- Use the Bezier Handles to smooth the effect further.
- Play around with the ramp until you’re happy with the look.
This trick allows you to create more realistic slow motion in Premiere Pro.
Optical flow
The Optical Flow feature can help smooth your slow-motion effect, making it look more like you shot at a higher frame rate.
When enabled, Premiere Pro will use existing frames to intelligently generate new frames to go in between your existing ones. The result is a smooth, rather than choppy, motion at all speeds.
Let’s look at an example of slow motion created using the Speed/Duration module with the default Time Interpolation (or Frame Sampling):
When using Frame Sampling, Premiere Pro duplicates existing frames to create the slow-motion effect. The result works, but it’s a bit choppy. Compare it with this example using Optical Flow. You can see the difference at the beginning of the clip when the dancer goes up on pointe.
To enable Optical Flow when using the Speed/Duration controls, change the Time Interpolation to Optical Flow. After making this change, you’ll have to render the footage before playing it back. Choose Sequence > Render In to Out.
Using Optical Flow to smooth a speed ramp is a little bit different. Right-click and choose Time Interpolation > Optical Flow. Now render the clip. In the right circumstances, this can create very beautiful slow motion.
But Optical Flow isn’t perfect. Because Premiere Pro generates entirely new frames, issues like warping and artifacts can occur. For best results, shoot against a simple, static background. The more detail and movement Premiere has to interpret, the more likely it is that something will look strange.
Level up with plugins
If you often work with slow motion and high-frame rate cameras, investing in software designed specifically for the task could be worth it. For precise retiming, you can try a plugin like Twixtor that will do the same thing as Optical Flow but at a higher level. Starting at $330, however, it’s an investment. Plus, it still won’t replace a high-frame-rate camera. If you only occasionally work with slow motion, you’ll be fine creating Adobe Premiere Pro slow-motion effects as needed. While not as versatile as full plugins, Motion Array also has some amazing effects templates that could be what you’re looking for.
In short, if you’re trying to be the next Slow Mo Guys, you’re going to need to invest in a fancy camera. If you simply need to retime a clip to fit an edit, highlight action in your YouTube video, or create a little drama, Premiere Pro alone or in tandem with some 60fps footage will do just fine.
There’s a lot you can do with speed ramping and slow motion in Adobe Premiere Pro — so have fun experimenting with these different slow-motion effects! If you’d like to know more about what Adobe Premiere Pro can do, why not check out Motion Array’s handy Premiere Pro tutorials section? You’re sure to find something new to inspire you.