


Have you ever dived into a video edit only to discover that your footage is too unsteady for what you’re trying to do? Fortunately, stabilizing shaky footage with Premiere Pro is easier than you might think.
Although After Effects gives you much more flexibility with stabilizing footage in post-production, Premiere Pro includes a stabilizer tool to fix camera shakiness and pep up your footage if you need a fast solution. Below, Motion Array will break down exactly how to stabilize video in Premiere Pro using the Warp Stabilizer.
Summary
Part 1: How to use the Adobe Premiere Pro Warp Stabilizer
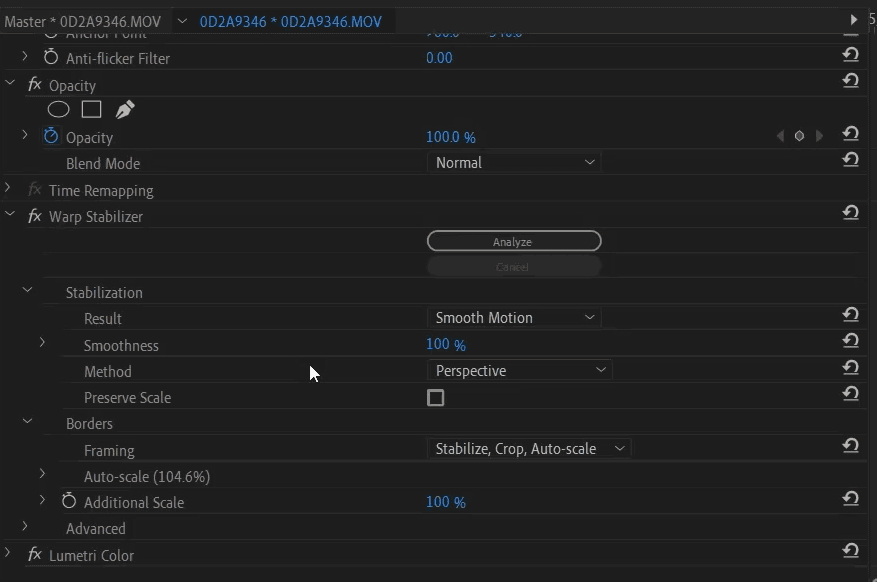
Applying Adobe Premiere Pro’s Warp Stabilizer effect is easy. It works similarly to the unsharp mask tool in that it makes footage crisper and clearer. After you’ve loaded your project, you can stabilize footage using the Warp Stabilizer the same way you’d apply any other effect.
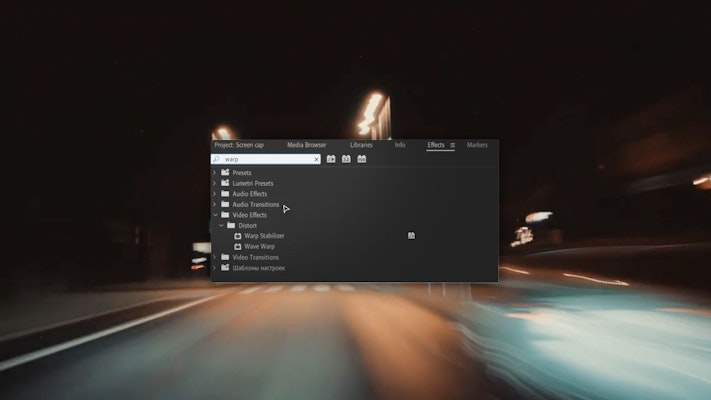
- Select the clip you want to stabilize.
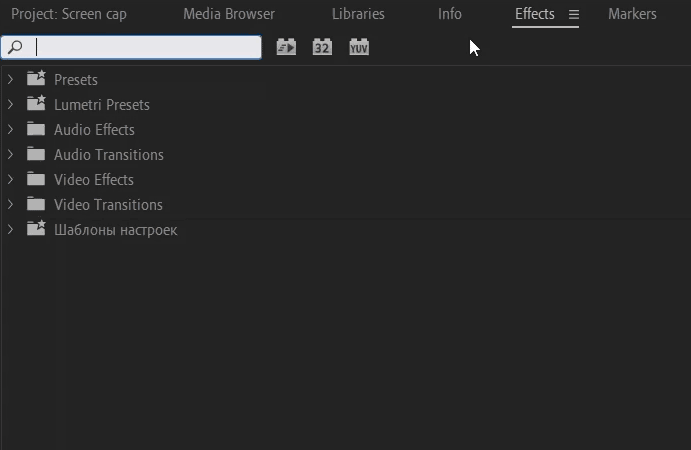
- Head to the Effects panel and find Warp Stabilizer.
- Double-click or drag it onto the clip on the timeline.
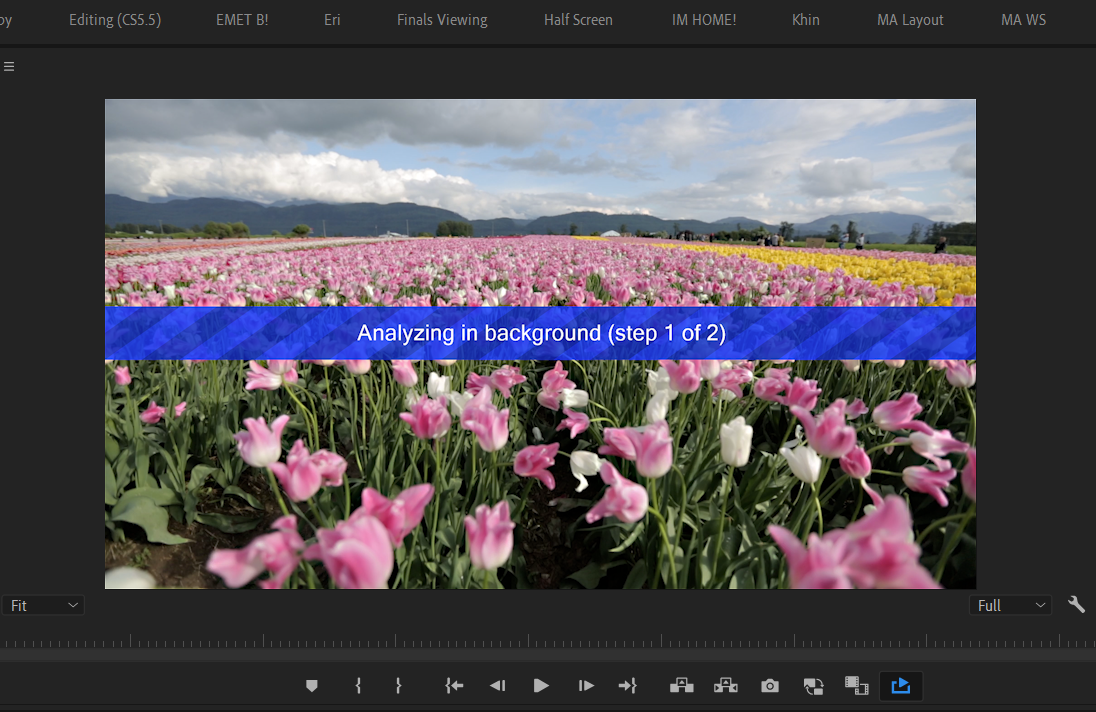
- You should see a blue Analyzing in background message across the footage. Leave it to finish — the time it will take depends on the length and complexity of the clip. You can keep editing while this happens in the background.
- Adjust the Smoothness parameter to tweak the overall amount of stabilization. You might not need to change this very much to get the desired result. Zero is closer to the original camera footage, while higher values create a more visible effect.
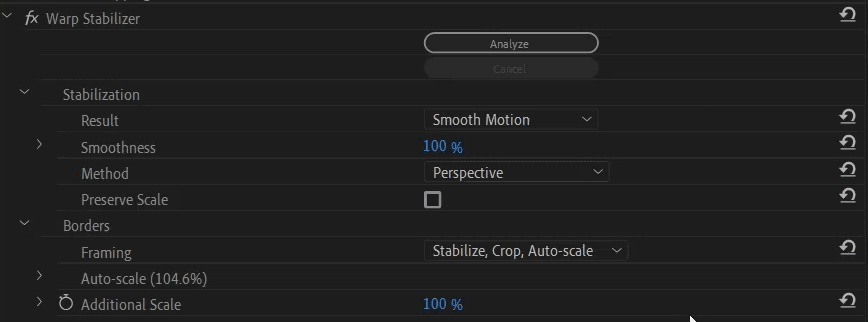
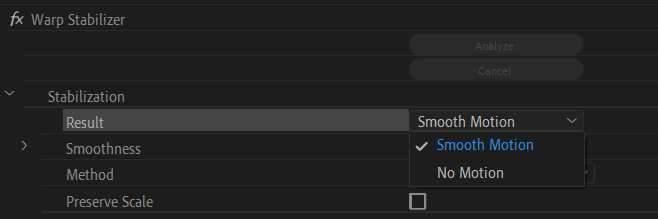
- If you want to create the effect of a stationary camera with no movement whatsoever, select Stabilization > Result > No Motion. If you want to remove the shakiness but keep the camera movement, select Smooth Motion.
- Click Analyze again to see the results. You’ve now stabilized your video in Premiere Pro.
Pro Tip: You must click Analyze again whenever you make changes after applying the effect. This also applies to changes to the clip, so bear that in mind if you trim it later.
Are you satisfied with how you’ve stabilized your shaky footage in Premiere Pro? You might be happy to leave it there, or you might see some warping that doesn’t look right in the background. The rest of Motion Array’s guide will walk you through fixing these issues. Remember, Motion Array’s YouTube channel has helpful tutorials for you, too.
Part 2: Top 6 Warp Stabilizer tips and troubleshooting tricks
Adobe Premiere Pro’s Warp Stabilizer is a powerful tool, but it has its limitations: Some noticeable warping in the background might offset a clip’s new steadiness. You’ll know it when you see it. Tweak the Smoothness slider to reduce this until you’re happy.
Alternatively, switch the Method to Position, Scale, Rotation, or Subspace Warp. As a final resort, jump into the Advanced dropdown and check Detailed Analysis. You can find out more about that below.
1. Adjust extra cropping
Using the Warp Stabilizer is a balancing act. A compromise might have to be made between the smoothness of a shot and losing some parts of the frame.
Remember, this effect isn’t for cropping the shot — it’s only for creating stable footage — but it might crop out the edges more than you would like to get a clean, smooth shot. You can reduce this by tweaking the Crop Less <-> Smooth More slider in the Advanced settings.

2. Shoot for the Warp Stabilizer
Rather than using it as an easy fix in your post workflow, you’ll succeed more if you shoot with the Warp Stabilizer in mind. It’s like adding the Vertigo effect — you get the best results with the best planning.
If you want smooth movement in your shots, but don’t have access to a gimbal, consider shooting with a wider frame or faster shutter speed. This will give you more flexibility when applying the effect in the edit.
You’ll also find useful tips for shooting smooth footage with handheld cameras to help you get higher-quality footage.
3. Order your effects
If you lose some stabilization after doing a quick color fix, make sure you don’t change the source for the Warp Stabilizer analysis.
Check the order of effects in the Effect Controls panel. The effects on the top are applied first, so Warp Stabilizer should always be at the top. If you switch anything around to create cool effects like the mirror effect, remember to re-analyze the clip.

4. Save as a preset
Once you’ve found a combination of settings that gives you a good result, you can save it as a preset. This should speed up your workflow nicely when you work with a lot of shaky footage, or if you want to create a similar effect across multiple projects.
Remember that the Warp Stabilizer needs to analyze the individual clip frame by frame — it’s not a one-size-fits-all model. So hit that Analyze button even after you’ve applied the preset to turn it on.
5. Nest your footage
A red banner across the footage is one of the most common error messages when stabilizing video in Premiere Pro. It pops up when you try to change the speed on a stabilized clip. You can’t use the Warp Stabilizer and change the speed of the same clip, however, there’s an easy fix. Right-click the altered clip, then apply Nest. You can now work on the nested sequence without these issues popping up.
6. Advanced settings
Once you’ve mastered the default Warp Stabilizer effect and what happens when you tweak the sliders, you can get comfortable with the settings in the Advanced tab.
- Detailed Analysis is a simple checkbox that makes the algorithm work harder to find parts of the footage to track. You might end up with a smoother shot, but you’ll also have a much heavier, slower project — so there’s a trade-off.
- Have you noticed a rippled distortion in your footage? Generally, the stabilizer automatically removes this. But if your footage was shot with a rolling shutter camera, try setting Rolling Shutter Ripple to Enhanced Reduction.
- You also have the option to hide that pesky warning banner that tells you to re-analyze the footage. Remember, the warning banner appears on the exported file, so this is also a handy way to avoid embarrassing client conversations.
Thanks to the Warp Stabilizer, stabilizing shaky footage in Premiere Pro is quick. With a bit of practice, you’ll soon get to grips with it. But, like most post-production fixes, nothing beats getting things right on the shoot. Plan to shoot with this feature in mind if you want to use it, or find yourself a gimbal to smooth out the shots in-camera. But if you’re still unhappy with your shaky footage, the Warp Stabilizer will do its best to fix it up.
If you’re looking for additional effects in Premiere Pro, Motion Array has all the tips, tricks, and tools you could need. Why not try adding a glass panel effect to your footage? Premiere Pro will help you get creative with your next project.


