


Premiere Pro is easy to use, but the underlying software is pretty complex. Running into glitches and problems can be frustrating! If your project playback is choppy, it doesn’t always prevent you from editing, but it can become a major challenge when you want to preview your changes. In this article, Motion Array will look at potential causes and ways you can fix your Premiere Pro choppy playback.
Summary
Part 1: What to check when your Premiere Pro playback is choppy
Before you can fix a problem, it helps to understand what’s causing it. Premiere Pro’s choppy playback could be caused by several things. Run through each of these troubleshooting steps to figure out what’s going wrong.
Check your hardware
The first thing to check is your computer hardware. Does your device have the specs to run Premiere Pro? If you’ve been editing on your device for a while and the choppy playback is a new issue, it’s unlikely to be a hardware problem, but it could be due to a lack of hard-drive space. Check where your project is saved and make sure there’s enough space for it to open and run.
Check for updates
Both Premiere Pro and your system software require regular updates. Using an older version of either can cause problems with your editing. Once you’ve checked out your hardware, check for program and system updates. That may be all you need to fix Premiere Pro’s playback lag.
Check the sequence and clip settings
If your choppy playback occurs on a particular clip or set of clips, it could be because there’s a clash between the sequence settings and clip settings. For example, this happens often when importing 4K or 50+ fps clips into a timeline sequence with different settings. It’s a common error if you use nested sequences a lot.
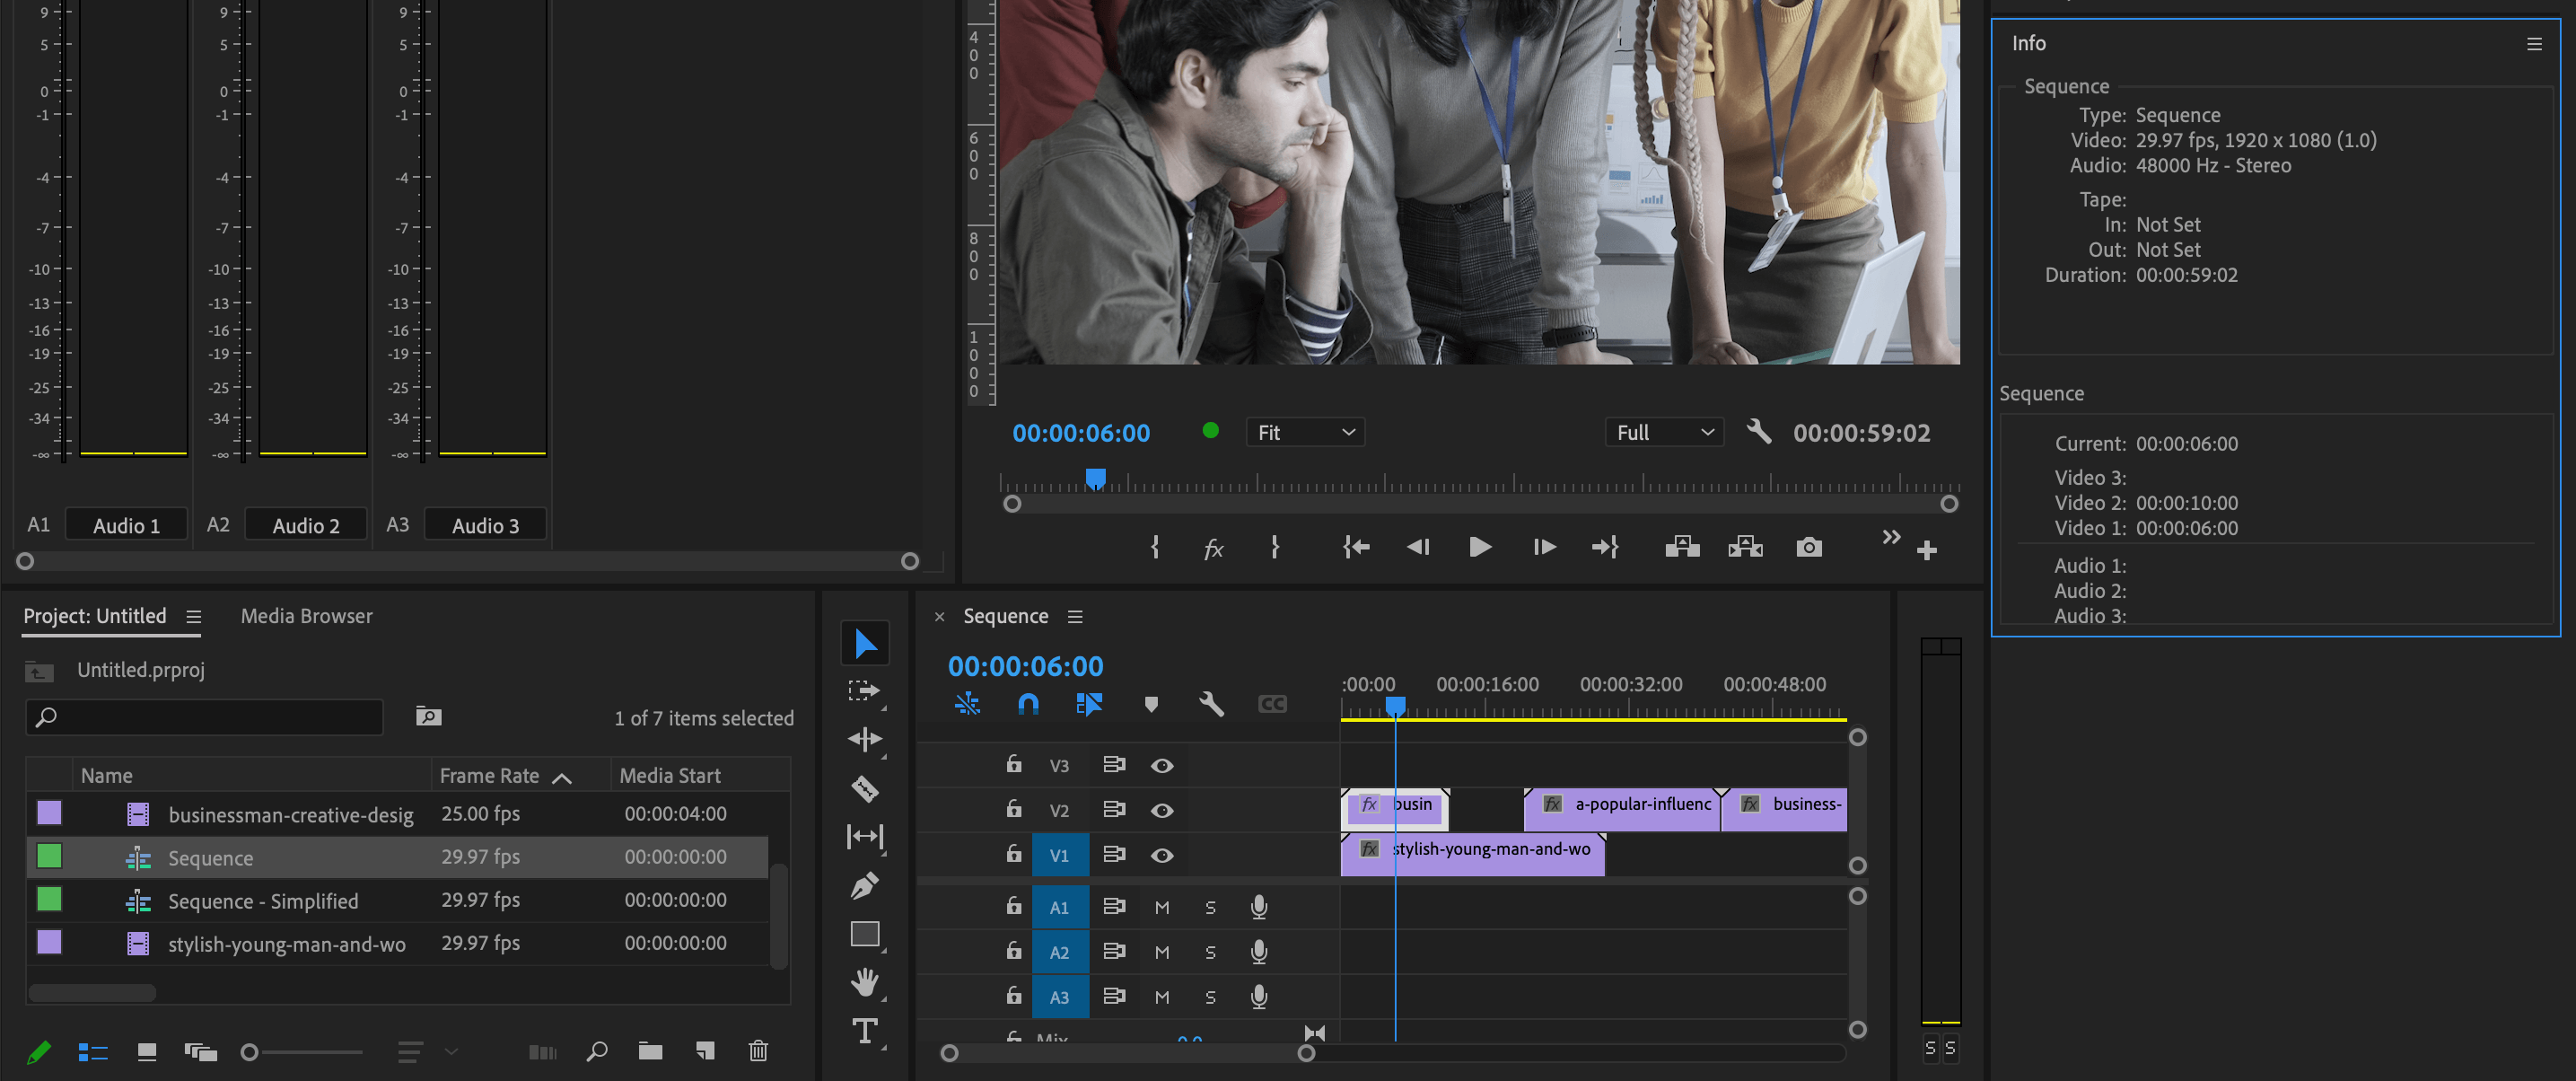
You can check the clip settings by highlighting them in the timeline and checking the Info tab in the Inspector. If the choppy clip was filmed with different settings from the rest of your sequence, you can isolate it and export it to match your other footage or create a Proxy clip.
Are too many applications open?
A surprisingly simple cause of Premiere Pro’s playback lag could be that your device is running too many applications simultaneously. This eats up a lot of your computer’s RAM. Like any editing software, Premiere Pro takes a lot of processing power to run, so even a simple web browser can slow down your playback. Close as many applications as possible so you only run those needed for your editing.
Try a classic: turn it off and on again
Yes, it works! Sometimes Premiere Pro gets a little ‘confused’ and problems with incorrect fragments, files, program code, and other issues may arise. Resetting the program and device can help the software configure itself correctly with a fresh boot. Just remember to save your work before shutting down.
Part 2: How to fix choppy playback in Premiere Pro
The core reason you’ll experience choppy playback in Premiere Pro comes down to how complicated your project is compared to your device’s capabilities. However, there are several ways to fix these lag issues directly within Premiere Pro. Let’s take a look.
Consolidate the project
Using a clean and concise file structure for your projects is always best practice. Premiere Pro can struggle if the behind-the-scenes action gets complicated. Using the Premiere Consolidation tool will ensure all your files and media are in the same place and easy for the program to access.
Consolidating a project allows you to select specific sequences within it and copy them to a new project in a new location. The process doesn’t just copy the sequence — it copies all the media and elements it uses. Consolidation is fantastic for archiving projects and decreasing their overall size at editing milestones.
- Go to File > Project Manager.
- Select the sequences you want to copy.
- Look through the other checkbox options to ensure you copy everything you need.
- Click on the file name to choose a new location.
- Select the Calculate button to see how large the project copy will be.
- Once you’re happy, hit OK and wait for Premiere Pro to complete the consolidation.
- Find your new project and open it to continue editing.
Enable GPU acceleration
If your computer has a dedicated graphics card for your video work, you can turn on the GPU acceleration for smoother playback.
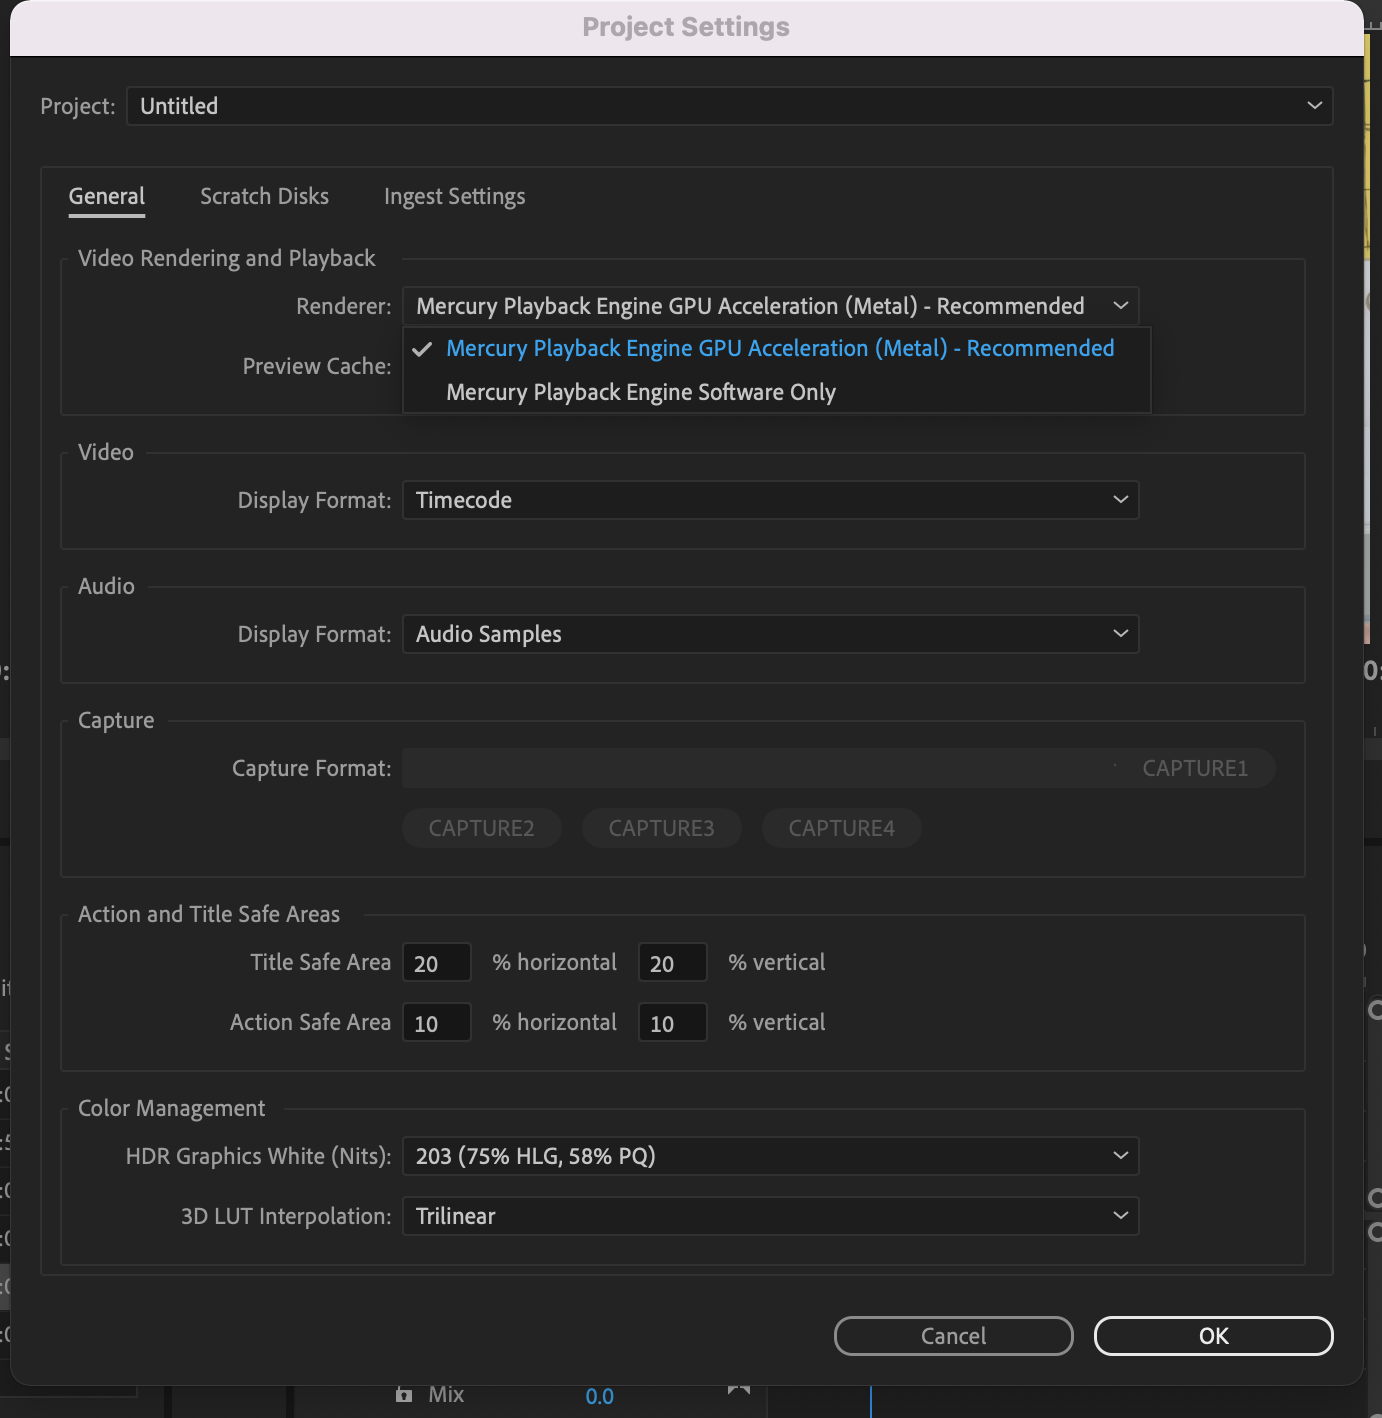
- Open Premiere Pro on your computer. You can open any project to enable GPU acceleration.
- Go to File > Project Settings > General to open the project settings pop-up box.
- Change the Renderer to Mercury Playback Engine GPU Acceleration (Metal) in the dropdown menu.
- Hit OK to save the new settings.
You should now be free to render your project as you need to.
Clear the media cache
The Media Cache is a folder where Premiere Pro saves accelerator files for your edit. These actually help with playback, as the program doesn’t have to re-render previews and other items over and over again. Premiere Pro will continuously add files every time you play back anything in your project, but if the media cache gets filled with these temporary files, it can take up a lot of space or files may corrupt. Ironically, this can then cause Premiere Pro choppy playback instead of fixing it.
When you clear your media cache, you must render your project again to help optimize performance. Motion Array has a handy guide to clearing your Premiere Pro media cache.
Adjust playback resolution

By default, Premiere Pro will play back your edit based on the sequence settings, likely 1080p or above. By dropping the playback resolution, the program needs to display less information for each frame, giving smoother playback.
The bottom-right corner of your Media Viewer has a dropdown menu that lets you change the playback resolution.
Toggle effects
If your project uses many visual effects, grading, or layers, the complexity might be causing Premiere Pro playback lag. If you need to check the speed of an edit, you can quickly toggle the effects off and on for the entire sequence.
- Check the toolbar at the bottom of the Media Viewer and look for an FX icon.
- If there’s no FX icon, click the + icon.
- Find the FX icon in the pop-up box and drag it to the Media Viewer toolbar. Once added, close the pop-up box.
- Click the FX icon on the toolbar to toggle your timeline effects off and on.
Create proxies
Many editors are wary of proxies, but they can be helpful on big projects with a lot of high-quality footage. We’ve already mentioned using proxies for sequence and clip setting differences, but you can also use them for your whole project.
Proxies are lower-quality versions of your original media. These low-quality files don’t replace your higher-quality clips, but act as a reference for your editing so you can revert to your HD edit with a single click and enjoy the speed boost while editing. Motion Array’s handy Premiere Pro workflow guide covers everything you need to know about working with proxies.
Part 3: How to fix stuttering and glitchy video in Premiere Pro
Many issues arise in Premiere Pro with no logical reason and no way of knowing what will fix them. This handy little trick is a fantastic solution for when you’re unsure of the cause of the problem and have exhausted other troubleshooting methods.
- Save and close your current project.
- Go to File > New > Project or hit Alt+Control+N or Option+Command+N on your keyboard.
- Save the new project in the same location and name it to indicate this is the latest version.
- Go to File > Import or hit Control+I or Command+I. Search the finder window for your previous Premiere Pro project.
- Select the Project File and hit Import. It can take a while, depending on the project size.
- Save your new project.
- In the Media Browser, search for the sequence and open it.
This is one of those solutions that shouldn’t change anything, but often clears up the Premiere Pro choppy playback issue. Even though there’s no good explanation for why this works, it’s a pretty good fix for glitches in Premiere Pro.
Choppy playback in Premiere Pro is frustrating, but fixable. Finding a solution that works might take a while, but hang in there. Now you know many ways to fix Premiere Pro’s playback lag and glitches, you can confidently edit your work. If you’re looking for more troubleshooting tips for Premiere Pro, check out this handy guide to preventing Premiere Pro crashing.


